

How To Draw A Long Ribblon Banner
Uncomplicated Steps to Drawing Banners

Banners are my favorite! Can y'all tell? They show up in my lettering all the time.

A nicely placed banner will accept your design up several notches! They're impressive, and with a lilliputian practice, y'all can be creating some really fun designs with them.
So I'll show you the basics in a three different ways, and at that place'southward a worksheet at the end that y'all tin can download for Free and print to try it out yourself.
Let's just jump correct in.
Straight Banner

1. Draw a straight line - or as straight every bit yous tin - followed by a parallel line below it.

two. Close the ii lines to create a rectangle.

3. Draw two lines on each side slightly below the meridian of the rectangle.

4. Now depict parallel lines only a flake below the rectangle. Every bit you meet above, the thickness of the rectangle and the new lines is virtually the same.

5. Now put a dot inbetween your new parallel lines, but inside a little (not flush with the ends). The dots will create your V-cuts on the tail of the ribbon.

6. Now you can create the V-cutting tails past drawing lines from each bespeak to the heart dot.

vii. Close the tails with ii straight lines that attach to the original rectangle.

8. Finally, depict a diagonal line from the corner of the original rectangle to the within corner of the tail. This creates a folded look.

9. You tin can shade the fold if you like.

ten. Don't forget your lettering!
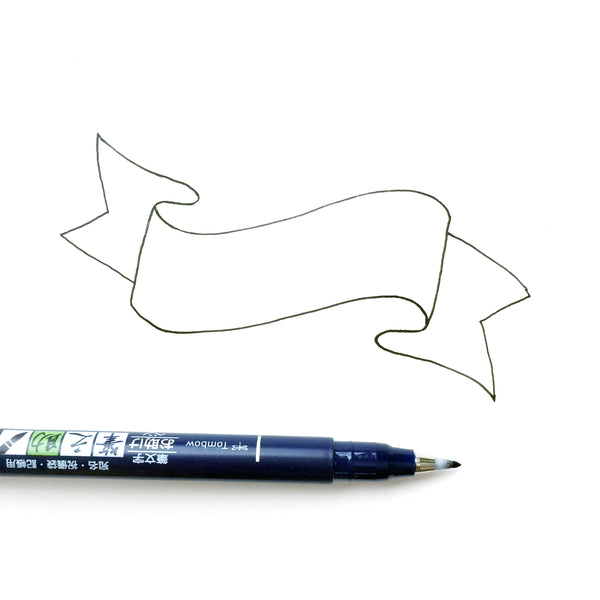
Wavy Imprint
 i. Start off by drawing 2 curvy parallel lines

ii. Connect the parallel lines to form a wavy rectangle.

3. Add a curvy tail on the pointed side to extend the rectangle. This is going to form the fold in your ribbon.

4. Next, describe a line on each side that is parallel to the tail you just created. This is the other part of your folded "ribbon," so you don't want it to be too fat or besides thin compared to the main rectangle. They should be pretty close to the same thickness.

5. At present put a dot in the heart of those ii lines. Just similar with the Directly Banner, you lot want to place information technology to the inside a fleck because you're using the dots to create your Five-cuts.
6. At present draw lines from each corner to the dot to crate your V-cutting. The dot helps you lot notice your centre so your V isn't off-centre.

7. You're not washed withal! Finish off your ribbon banner by drawing a direct line from the S-tail to the main rectangle. This is important because it completes that folded look. Now you can shade information technology in or draw some lines to off-set information technology.

eight. Don't forget to add your lettering!
Charabanc Wavy Imprint

i. Ok don't hate me - I love motorcoach banners, simply I totally made up that name. I have no idea what they're called. Outset off with two parallel wavy lines.

2. Then draw another ready of parallel wavy lines under it, and slightly offset to the right.

three. Connect your bottom section by drawing a line up from the bottom corner to the top corner, so diagonally to connect the two levels.

4. Finish off the elevation department by drawing a line from the top corner to the bottom corner
and and so diagonally down to bring together the bottom level.
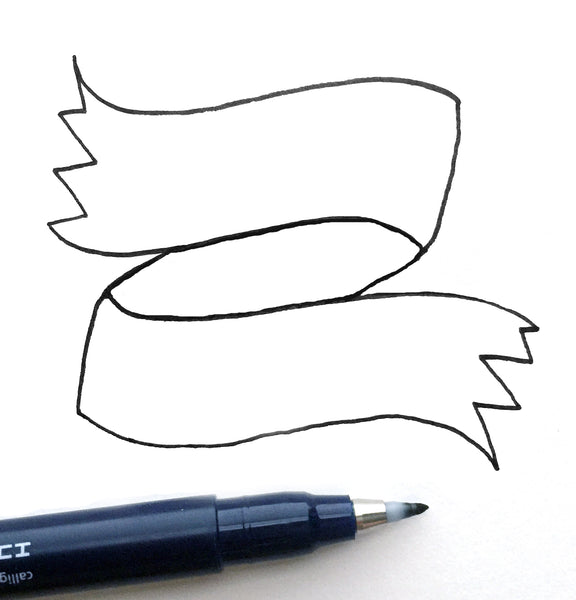
five. Now finish of the ends. You can do the same V-cut as the first two banners nosotros learned, or straight or jagged every bit seen here. Put your ain spin on it!

vi. Shade the middle yet you wish, or leave information technology equally is.

7. And finally, add together your lettering!
And those are three basic means to describe banners. Your worksheet has a few other styles for yous to try out. Utilize the basic directions you learned hither to draw them.
Take fun!

Download the accompanying worksheet to print and practice.

If you enjoyed this tutorial and want more than like it, cheque out my new book Faith and Lettering: An Inspirational Guide to Creative Lettering & Journaling (Amazon link)
With love and lettering,

*Affiliate links are used in this post. If you try this out, mail a picture of your drawing on Instagram using the #krystalwhittenblog tag! I can't wait to see.

9 Responses
Leave a annotate
Comments will be canonical earlier showing upwards.

Source: https://www.krystalwhitten.com/blogs/news/easy-steps-to-drawing-banners
Posted by: hughesthind1949.blogspot.com
0 Response to "How To Draw A Long Ribblon Banner"
Post a Comment